

Detail View
An overview of all areas in the VAULO detail view – header, info panel, and footer with their features.
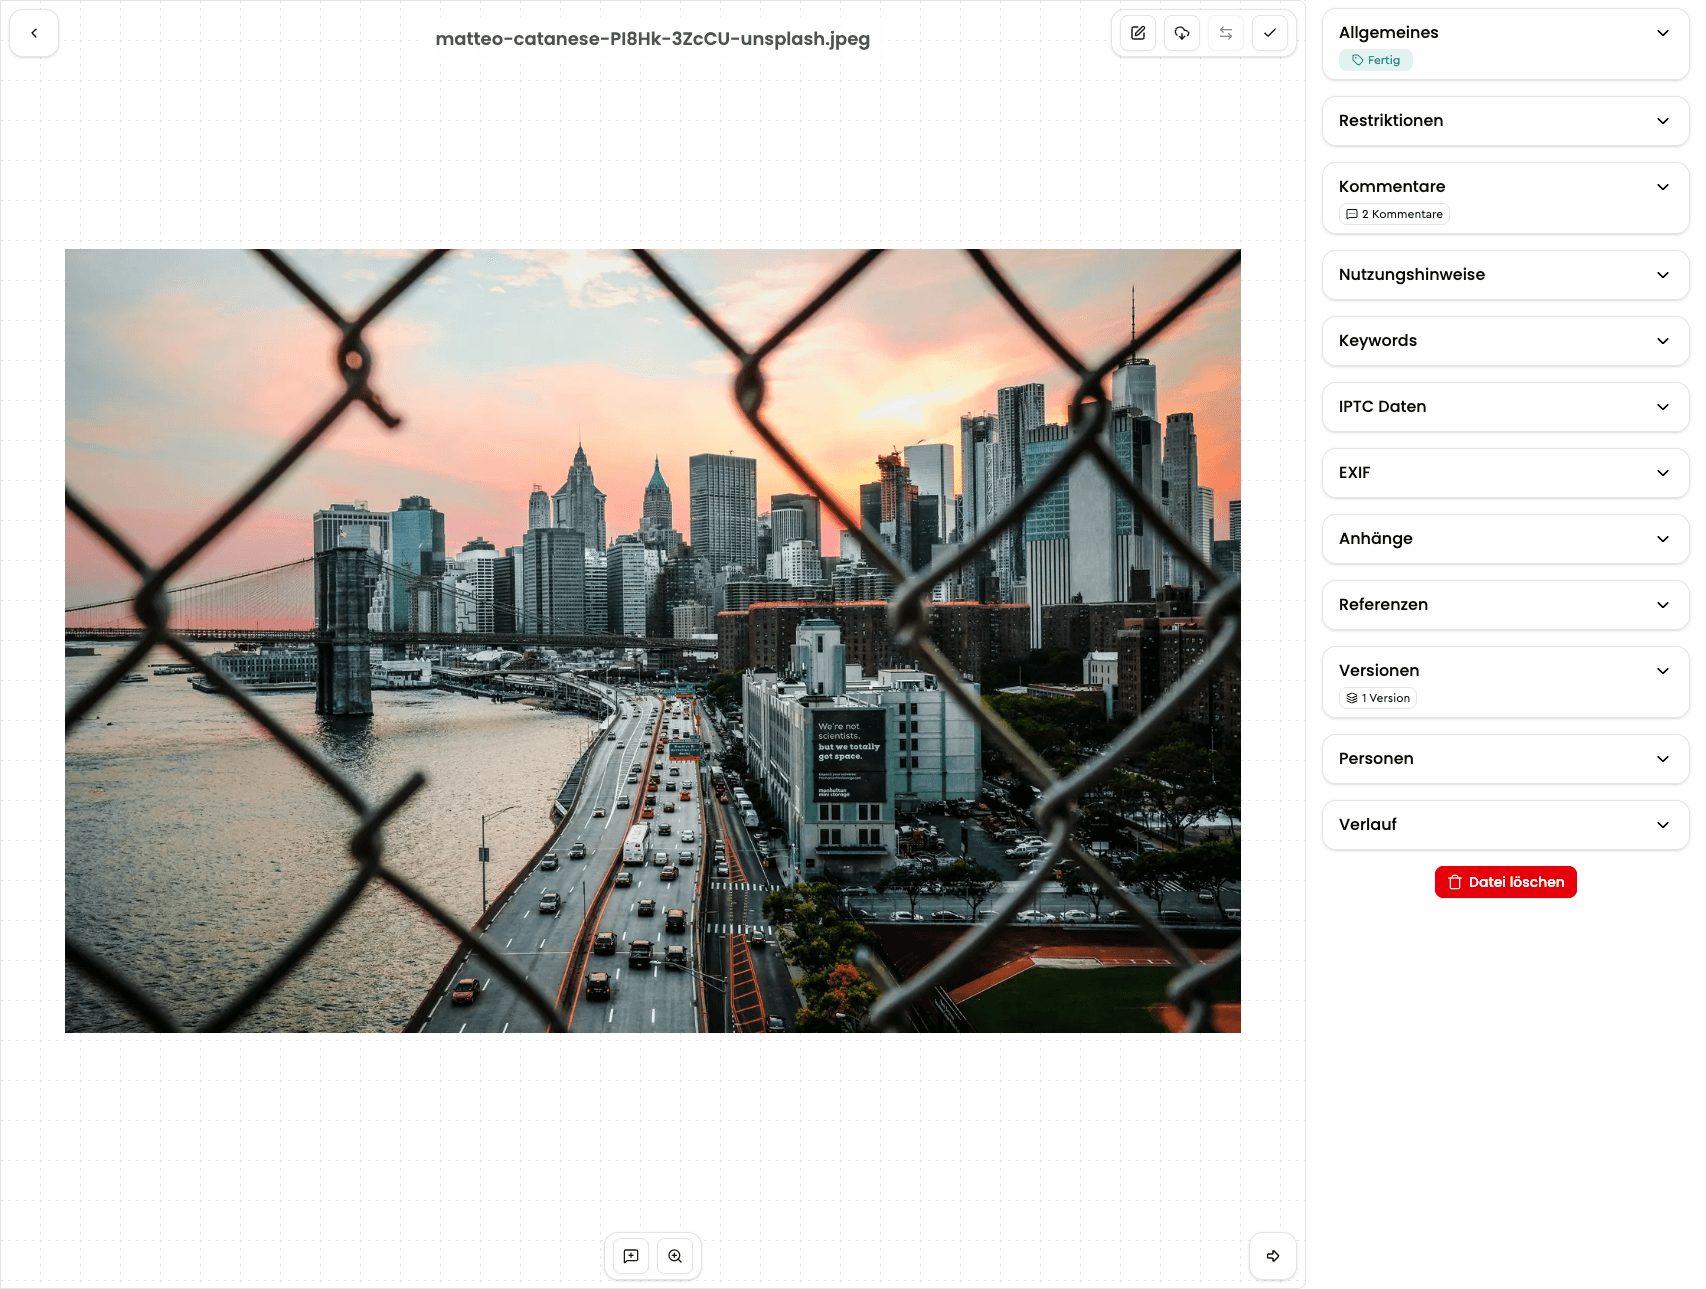
The detail view opens when you click on a file in VAULO. It is divided into three areas: the header with the file name and quick actions, the info panel on the right side with all metadata and blocks, and the footer with comment and zoom functions.
Header
The full file name including extension is always displayed in the upper center of the detail view. To the right of it are four icons:

Edit media ImageDocument
– Photo Editor Click the pencil icon to edit the image directly in VAULO.
Photo Editor
Crop, rotate and adjust images directly in VAULO.
Document Editor
Edit and annotate documents directly in VAULO.
Download
– Download Use this button to download the file directly from the detail view.
Version comparison
– Version comparison This icon is grayed out as long as no second version of the file exists. Once you have uploaded another version, you can use this button to compare both versions side by side.
Select
– Select for Lightbox Click this icon to add the file to the VAULO Lightbox. The Lightbox appears at the bottom of the screen and lets you label, flag and process multiple files at once.
Lightbox
Label, flag and process multiple files at once.
Footer
The footer contains buttons for commenting on and zooming into the file. It also includes navigation to move between files in the folder.

Comment function
To add a comment:
Click the icon at the bottom of the screen.
Optional: Click the icon below the comment field to add a drawing to the image. Choose between arrow, circle and freehand. Use the color slider to set the color. Click the icon (to the left of the color slider) to undo the last step.
Click the icon next to the pencil to make the comment visible to your team only. Comments not marked as internal can also be seen by external viewers in approval mode.
The comment then appears in the right panel. Colleagues can reply to it or leave a like.
View ImageVideo
Use the icon to access various zoom and orientation options.
Info panel
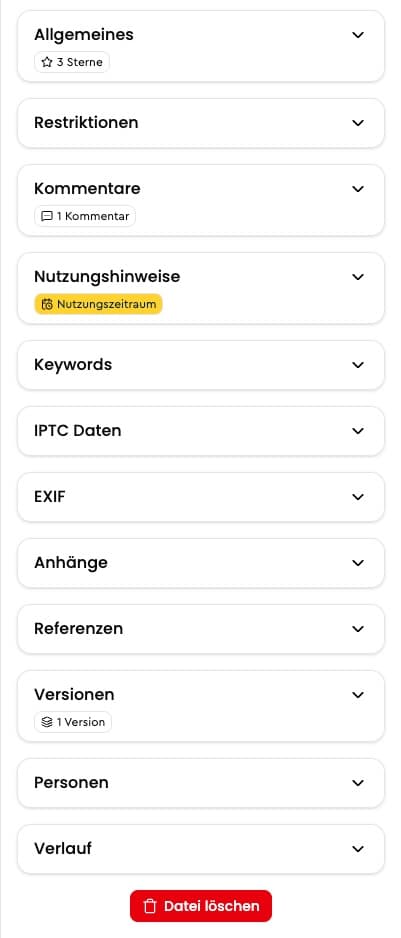
On the right side of the detail view you'll find all relevant information about the file. It is divided into individual blocks that you can show, hide and reorder as needed.
General
This block shows at a glance: file name, description, label and rating status. You can edit all of these directly here. Press Enter to save a changed file name. An empty name is not saved: an error appears below the field saying the file name must not be empty. Press Esc or leave the empty field to restore the previous name.
Restrictions
A restriction locks a specific file version from being downloaded – the file itself stays visible and searchable. Here's how:
Enable the toggle next to "Lock download".
Optionally enter a reason for the restriction in the text field.
Select the restriction period from the "Time limit" dropdown:
- Permanent
- From a date
- Until a date
- Date range
Every change is saved immediately – there's no separate confirm button.
Once a restriction is active, the collapsed section shows the icon with the label "Download locked". The file is also marked as restricted in the grid view, and any download attempt is blocked with a corresponding notice.
Editing a restriction requires permission to rename versions. Without it, the section is shown read-only.
Comments
All submitted comments are displayed here, including replies and likes. If a drawing was added to the photo as part of a comment, a small pen icon appears next to that comment – clicking it overlays the drawing on the photo.
Use "Reply" to respond directly to a comment. You can delete your own comments via the menu – comments can't be edited after posting, and you can't delete comments from other people.
For PDF files, annotation doesn't use the drawing tool from the footer area — it uses the PDF viewer's own built-in annotation mode instead.
Usage rights
Here you define the period during which a file may be used and the terms that apply:
Enter the applicable usage terms in the "Usage terms" text field. The entry saves automatically when you leave the field.
Pick a start and end date in the calendar under "Usage period". This selection is also applied immediately.
Use "Delete usage period" to remove an already-set period.
Depending on status, the section shows "Not yet valid", "Valid", or "Expired". If the current date falls outside the entered usage period, the copyright icon is also highlighted in red in the grid view.
Admins can require members to actively confirm the usage period before every download, under Organization settings → Policies & Roles. An automatic email notification before a usage period expires can additionally be set up via the LegalHub add-on.
Keywords
Keywords entered in this block are automatically synchronized with the keywords in the IPTC block. Since keywords are often assigned without additional IPTC data, this block is listed as a separate section.
Thumbnail Video
In the Thumbnail area you choose which image your video shows in VAULO – much like on YouTube. Without your own thumbnail, VAULO automatically shows the first frame of the video.
To pick a frame from the video:
Move the video in the player to the moment you want to use.
In the Thumbnail area, click "Use current frame".
Alternatively, upload your own image, such as a designed title card (JPG, PNG or WebP), with "Upload custom image…". "Reset thumbnail" takes you back to the automatic thumbnail.
The thumbnail appears in the tile view, as the still image in the player, in galleries, in shared links and in link previews, for example in WhatsApp or Slack. When you hover over a tile, you still see the video's frame strip as usual.
The thumbnail belongs to a specific version. When you upload a new version, it takes over the previous thumbnail – you can change it for the new version afterwards. Changing it requires the permission to upload new versions.
IPTC data Image
VAULO provides the most important IPTC fields: headline, description, keywords, creator information and more. For location data, VAULO distinguishes between location and the more specific sublocation (e.g. a district or building). Use keywords in particular to make your images easily and reliably searchable in VAULO.
Keyword templates
Create and apply templates for frequently used keywords.
EXIF data Image
Here you'll find all the technical information your camera automatically saved when taking the shot – including:
- Date taken
- Resolution
- Aperture
- Shutter speed
- ISO value
- Focal length
- Orientation
- Camera model
- Lens
- Copyright (from the camera)
- Color space
- Color profile
If the file contains GPS data, VAULO also shows a GPS block with details such as location (latitude and longitude), altitude, timestamp and image direction.
Attachments
Add additional documents to a file – for example a model release form or an associated invoice. Supported formats: PDF, Office files and images.
Alternatively, you can link the file to another file already in VAULO. This link is then visible in the linked file under the References tab (see the References section below).
References
If you have linked a file to another file in VAULO, you can see that link here. This lets you connect model releases or contracts to multiple image files – and every contract shows all linked files at a glance.
Versions
In the Versions tab you can upload a new version of the file:
Click "Upload version" and pick the new file.
The dialog „Neue Version hochladen" ("Upload new version") opens. Leave „Beschreibende Angaben der aktuellen Version übernehmen" ("Keep the descriptive details of the current version") ticked if the new version should keep the headline, title, description, photographer, copyright holder and the other descriptive details. Then click „Hochladen" ("Upload").
The new version is automatically set as the active version.
Use the three-dot menu next to a version to view, rename, download or set it as the active version.
A new version takes over the descriptive details of the previous version. Details stored in the new file itself only fill fields that are still empty – values you have already maintained are kept. The same applies when you save an image in the photo editor as a new version. If you upload a file whose name already exists in the folder, the "File Already Exists" dialog shows the same checkbox; there it applies to "Add as New Version" and "Overwrite Version".
If you upload a completely different subject as a new version, untick the checkbox in the dialog. The new version then starts without the details of the current version and only contains what is stored in the new file.
Versions that were created earlier without these details are not filled in afterwards. If, for example, the title or required fields are missing there, use the three-dot menu to set the previous version as the active version again, or fill in the fields again.
People
Here you can see which people were recognized in the image – provided you have the VisionAI add-on activated.
VisionAI
Activate and use person recognition and AI-powered image analysis.
History
Here you'll find a complete chronological log of all relevant events for the file – for example when and by whom it was uploaded or edited.
Using the Review Mode: Discuss and Approve Files Together
Learn how to activate the review mode in VAULO to share photos and videos with external agencies or partners. This guide shows you step by step how to share a folder, create a presentation in review mode, and share the link with commenting, sketching, and rating features. Prerequisite: You have access to a folder in your VAULO Digital Asset Management System.
Advanced
Shortcuts, format templates, and other advanced features in VAULO.