

Using a custom font in presentations
Learn how to select your organization font in Presentation Studio to match your presentations to your corporate identity.
In the Presentation Studio you can set a custom font for your presentation — either one of the 1,945+ available fonts or your organization's uploaded font.
Prerequisite: Upload an organization font
For your custom font to appear as an option in Presentation Studio, it first needs to be uploaded in the organization settings. See Set up a custom font for your organization for instructions.
If the font is already configured there, you can proceed directly with the steps below.
Set the font for a presentation
Open the desired presentation in Presentation Studio. See Opening Presentation Studio if you need help getting started.
In the right sidebar, click the button to open the Design tab.
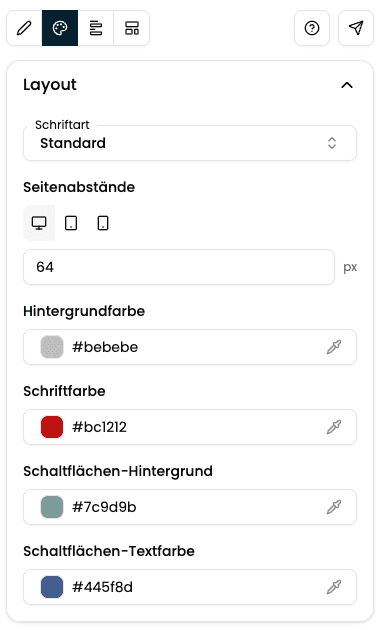
Click the Font dropdown (it shows Standard by default).
The Choose font dialog opens.
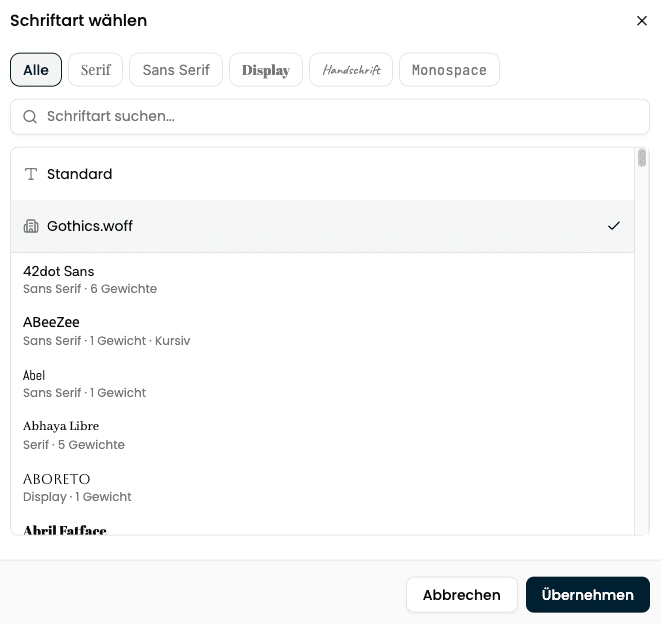
At the top you'll see Standard (currently selected) and, directly below it, your organization font — recognizable by the icon and the file name (e.g. Gothics.woff).
The organization font only appears here if it has been uploaded in the Theme Settings first.
Select your desired font. You can:
- Use the filter tabs (All, Serif, Sans Serif, Display, Handwriting, Monospace) to narrow the list
- Search for a font name directly using the search field
Each font shows its category, the number of available weights, and whether italics are supported.
Click Apply to confirm your selection.
The font is applied to the entire presentation immediately.
Reset the font
To return to the default font, open the dropdown again, select Standard from the list, and confirm with Apply.
Alternatively, use the button next to the dropdown to reset the selection directly.